2018年6月2日星期六

How to install the folding mirror for Land Rover ?

Instrution for Installing the Land Rover folding mirror Prepare tools

skype:chalin.abc, whatsapp:+86 15220061978
Withdraw door panel trim 
 
whatsapp:+86 152 2006 1978
Withdraw total 5 pcs screws on the door panel
 
whatsapp:+86 152 2006 1978
4Take off door panel,the key cables ,then take off the plug 
 
whatsapp:+86 152 2006 1978
Take off rear mirror assembly 
 
whatsapp:+86 152 2006 1978
6Take off  the mirror regulator with T10 tool 
 
whatsapp:+86 152 2006 1978
 7Withdraw the mirror regulator basic mount and all the screw
whatsapp:+86 152 2006 1978
 8Take off  the rear mirror cover 
whatsapp:+86 152 2006 1978
 9Take off the screw after withdrawing the rear mirror cover.
whatsapp:+86 152 2006 1978
 10Upward the buckle after separating the frame and rear mirroring cover 
whatsapp:+86 152 2006 1978
11Separation effect diagram
whatsapp:+86 152 2006 1978
12Follow the arrow direction to open up the iron tube with tool, devide the plastic part and basic mount.
 
whatsapp:+86 152 2006 1978
13Effect picture after installing the folding plastic part.
 
whatsapp:+86 152 2006 1978
14Recver the rear mirror, connect the motor male and female plug 
 
whatsapp:+86 152 2006 1978
15Picture show driver door panel ,the White LIN cable(#16) connect to original car door panel #16 plug which under the subwoofer 
 
whatsapp:+86 152 2006 1978
16Take off the harness box which local in driver door side
 
whatsapp:+86 152 2006 1978
17Run the motor cable (white ,green,blue.) to the harness box 
 
whatsapp:+86 152 2006 1978
18 3 pcs female plug connect to original car module ,make sure its connected with corresponded Male Number 
 
whatsapp:+86 152 2006 1978
 19 Be attention that no cables outside and no cables was under pressed
whatsapp:+86 152 2006 1978
20 Withdraw total 3 pcs screws
 
whatsapp:+86 152 2006 1978
21Take out the lamp.
whatsapp:+86 152 2006 1978
22 Take off the engine cover switch screw
 
whatsapp:+86 152 2006 1978
23 Take out the plastic cover 
 
whatsapp:+86 152 2006 1978
24 Take off the original car module and take out the cover
 
whatsapp:+86 152 2006 1978
25 Take out the blue color plastic cover
 
whatsapp:+86 152 2006 1978
26 OBD modules male terminal must be connect as above picture showed.(connect the Corresponding color
 
whatsapp:+86 152 2006 1978
27 Take out original car OBD module with screw .
 
whatsapp:+86 152 2006 1978
28 Switch original car OBD to our OBD
 
whatsapp:+86 152 2006 1978
29 Plug to module, make sure it connect well .
 
whatsapp:+86 152 2006 1978
30 Module install under the cushion of left side .
 
whatsapp:+86 152 2006 1978
 31 Devide two copilot door cables , connect the 
whatsapp:+86 152 2006 1978
32 PIN definition diagram
 
whatsapp:+86 152 2006 1978
 
whatsapp:+86 152 2006 1978
For 2016 version OBD :
Module #1---OBD#16(12V)
Module #2---OBD#3(CAN/H)
Module #3---OBD#11(CAN/L)
Module #10---OBD#4(GND)
Module #12--Spread power out (12V)
Module #14--Folding power out (12V)
Module #8--Door Plug assembly #16

For 2017 version OBD :
Module #1---OBD#16(12V)
Module #2---OBD#1(CAN/H)
Module #3---OBD#9(CAN/L)
Module #10---OBD#4(GND)
Module #12--Spread power out (12V)
Module #14--Folding power out (12V)
Module #8--Door Plug assembly #16
WWW.CARTUNINGSTATION.COM

2018年1月27日星期六

How to install multi-color mid speaker cover for Mercedes-Benz ?

Install mid speaker cover(grill) for Mercedes-Benz W205 X253 W213

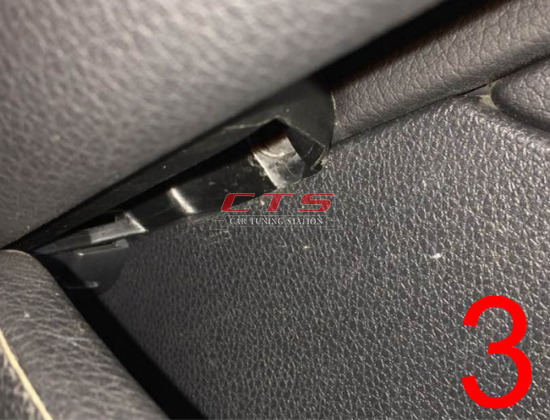
Picture 1-3 : Use T30 tool remove two screw in the door panel


 Picture 4-6:Seperate door panel with vehicle door.
 Picture 7:Push out the door panel towards the left  Picture8:Take off the window control line picture9: Remove the whole door pane picture10:Take off the original mid speaker cable picture11:Release the buckle with screw driver picture12: Remove the seat button control part picture13: Take off original speaker fixed glue. picture14-15:Replace our mid speaker and fixed it with glue.
 picture16-18:Take out original plug( #03),connect the mid speaker cable by white plug.

 picture19:Test the mid speaker and eset door panel 


2017年12月13日星期三

How to install Bang&Olufsen tweeter for Mercedes-Benz W166 GLE class

How to install Bang&Olufsen tweeter for Mercedes-Benz W166 GLE class

1 Take out original tweeter cover.

2 Take off the whole window platen

3 Take off the fixed button

4 Open the cover of door panel inner handle

5 Release Screw

6 Take off the door panel


7 Take off the handle steel wire


8 Take out the plug of door panel

9 Switch our tweeter power cable

10 Switch tweeter cable

11 Connect the ambient light power cable

12 Fixed the control box

13 Reset the door panel after fixed the control box

14 Effect picture after installation .

  Video by Youtube: https://youtu.be/FYsG87jUN_s
  Skype:chalin.abc